


Drawing Illustrations with Clip Studio Paint
The following is an introduction to the functions used for drawing a simple color illustration with Clip Studio Paint.

·To create a new canvas (file) → "New"
·To select a tool → "Tool Palette"
·To draw with pencil touch > "Pencil Tool"
·To erase a drawn line → "Eraser Tool"
|
|
·When taking a break on an ongoing illustration, be sure to save it. If you quit without saving, the illustration on the canvas will be lost. To save the file, select [File] menu > [Save]. ·You can change the canvas view to make drawing easier. To change the canvas scale, see "Zoom Tool". To zoom in/out the canvas or change its display position, see "Move Tool". |
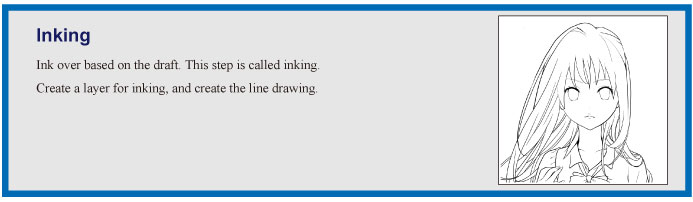
·To create a new layer → "New Raster Layer"
Create a new layer for inking.
·To select a layer → "Select the layer"
·To draw with pen touch → "Pen Tool"
·To adjust pen thickness → "Tool property Palette"
|
|
The [Eraser] tool can also erase lines drawn with the [Pen] tool, etc. Furthermore, by selecting [Edit] menu > [Undo], you can cancel the last operation. |
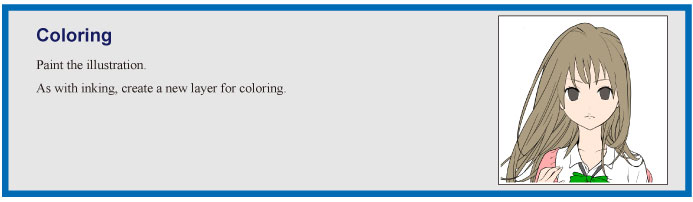
·To hide a layer → "Switching Show/Hide for a Layer"
Hide the draft layer to make coloring easier.
·To create a new layer → "New Raster Layer"
·To select a layer → "Select the layer"
·To select a color → "Color Wheel Palette"/"Color Set Palette"
To select a color, you can use the [Color Wheel] palette or the [Color Set] palette.
·To fill a closed area → "Fill Tool"
·Creating a fill in monochrome layer and filling it allows you to change colors easily. For details, see "Fill [PRO/EX]".
·Creating a gradient layer allows you to add a gradient effect to an illustration. For details, see "Gradient layer [PRO/EX]".
|
|
To fill other layers while keeping the line drawing layer, select [All layers] for [Refer multiple] on the [Tool Property] palette and select the [Fill] tool. |
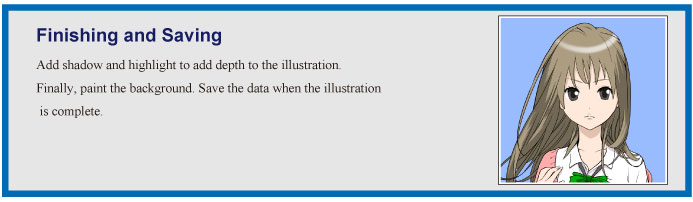
·To create a new layer → "New Raster Layer"
Creates a new layer to add shadows and highlights.
·To select a layer → "Select the layer"
·To change the stacking order of a layer → "Changing the Stacking Order of a Layer"
The stacking order of a layer can be changed with the [Layer] palette. Shadows and highlights must be placed above the colored layers while backgrounds must be placed below the colored layers.
|
|
If the drawn content is not shown on the canvas, move the layer upwards. Changing the order in which layers are stacked may solve the problem. |
·To select a color → "Color Wheel Palette"/"Color Set Palette"
Select the color for shadows and highlights from the [Color Wheel] and [Color Set] palettes.
·To draw highlights and shadows → "Pen Tool"/"Airbrush Tool"
Using the [Airbrush] tool allows you to add Although a blur effect.
·To paint the background → "Fill Tool"
·To tone a layer → "Layer Property Palette [PRO/EX]"
You can tone a layer using [Toning] on the [Layer Property] palette.
·To save a file → "Save"
·To open a previously saved file → "Open"