Ruler/Frame [PRO/EX]
Allows you to perform operations related to the ruler/frame border.
·Allows you to divide/integrate frame borders.
·Allows you to delete and show rulers, create perspective rulers, etc. It also allows you to set whether to move the ruler along with the drawing area of the layer being edited, or separately.
Selection from Ruler
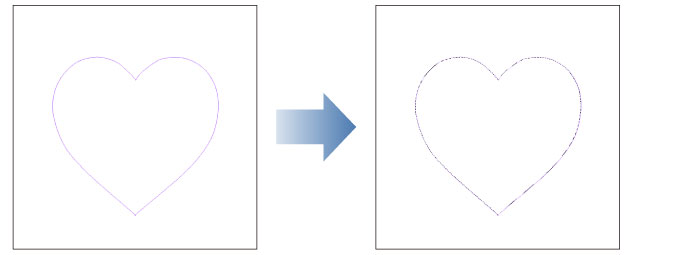
Select a layer that has a ruler with a closed shape. Select the [Layer] menu > [Ruler/Frame] > [Selection from Ruler] to create a selection area.
|
|
You cannot create a selection from a ruler that does not have a closed shape. |
|
|
You can also create a selection on the [Layer] palette by clicking the ruler icon while holding down Ctrl. |
Draw along ruler
Allows you to draw a line along a ruler on the canvas.
You can also set the drawing color from the color palette. Select the layer you want to draw on, and then select [Layer] menu > [Ruler/Frame] > [Draw along ruler] to show the [Draw along ruler] dialog box. Set [Line width] and [Anti-aliasing] settings, and then click [OK] to draw a line along the ruler on the selected layer.

|
|
·If you have a specific ruler selected with the Object subtool, lines will only be drawn along the selected portion of the ruler. ·This does not apply to the Special ruler, Perspective ruler, or the Symmetrical ruler. |
Draw along ruler Dialog Box

(1) Line width
You can set the width of the line when drawing along the ruler.
(2) Anti-aliasing
You can set the strength of the anti-aliasing. You can select from [None], [Weak], [Middle], or [Strong].
Ruler from vector
Select a vector layer and the select [Layer] menu > [Ruler/Frame] > [Ruler from Vector] to create a ruler that matches the image on the vector layer.

|
|
·If you have a specific line selected with the Object subtool, only the selected portion will be converted to a ruler. ·[Ruler from Vector] does not work on a Vector layer that is hidden or has keyframes enabled on a Vector layer in the [Timeline] palette. ·It also cannot be used on balloon layers, vector image material layers, or frame border folders. |
Delete Ruler
Select the ruler with the [Object] tool. Select the [Layer] menu > [Ruler/Frame] > [Delete ruler] to it.
|
|
If no ruler is selected, this will delete all rulers on the current layer. |
Show Ruler
Select the [Layer] menu > [Ruler/Frame] > [Show Ruler] to hide or display or hide the rulers on the current layer.
Link Ruler to Layer
Select the [Layer] menu > [Ruler/Frame] > [Link Ruler to Layer] to link the movement of the layer and rulers on the layer.
·When turned on, the rulers move with the layer when it is moved with the [Move layer] tool.
·When turned off, the rulers and the content on the layer can be moved separately with the [Move layer] tool.
Create Perspective Ruler
Select the [Layer] menu > [Ruler/Frame] > [Create Perspective Ruler] to create a ruler for perspective drawing with up to three vanishing points.
|
|
For details on perspective rulers, see "Explanation: Perspective ruler [PRO/EX]". |
Divide frame border equally
Allows you to divide frame borders into equal sections. While selecting a frame border folder on the [Layer] palette, select the [Layer] menu > [Ruler/Frame] > [Divide frame border equally] to open the dialog box.
In the dialog box, you can set the number of divisions, direction of the division, and the folder structure of the frame border folder after division.
[Divide frame border equally] Dialog Box

(1) Number of vertical divisions
Set the number of vertical divisions in the frame border.
(2) Number of horizontal divisions
Set the number of horizontal divisions in the frame border.
(3) Fit to Side Direction of Frame
Set the angle of the divided sides.
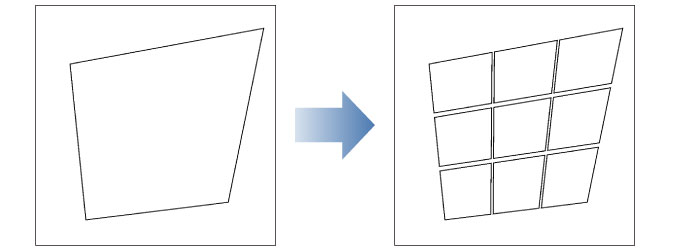
When turned on, the frame border will be divided at the same angles as the original frame border.
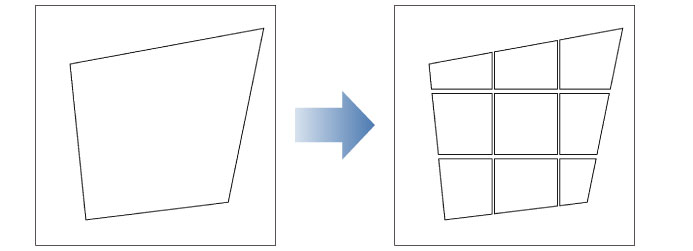
When turned off, the frame border will be divided vertically and horizontally.
(4) Divide folder
Set up the structure of the frame border folders after division.
|
Duplicate Layer |
The original frame border folder will be deleted, and a new frame border folder will be created for each divided frame border. The images in the original frame border folder will be copied to each new frame border folder. |
|
Create empty folder |
The original frame border folder is left as it is, and an empty frame border folder is created for each new frame border. The images remain stored in the original frame border folder. |
|
Not change |
The frame border are only divided, and no changes are made to the frame border folders. |
Combine frames
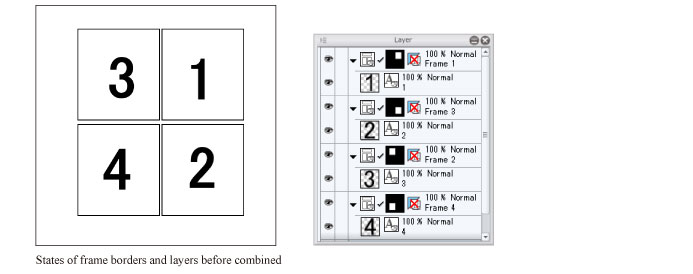
Combines the frame border folders that are currently selected on the [Layer] palette. While selecting a frame border folder on the [Layer] palette, select the [Layer] menu > [Ruler/Frame] > [Combine frames] to open the dialog box.
In the dialog box, you can set the structure of the frame border folder after combining.
[Combine frames] Dialog Box

(1) Combine folder
You can set the structure of the frame border folder after combining.
Combine border
Connects the frame borders to combine them into one frame border. The images in the original frame border folders are stored in a newly created frame border folder.
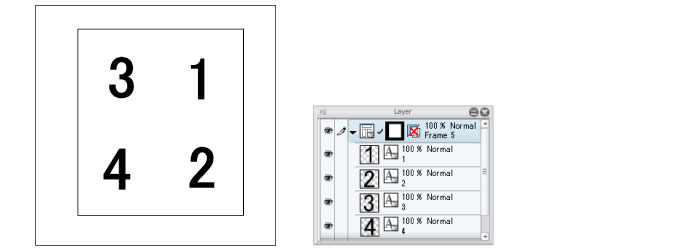
Combine only folder
Combines the folders into one frame border folder, while leaving the border lines as they are. The images in the original frame border folders are stored in a newly created frame border folder.
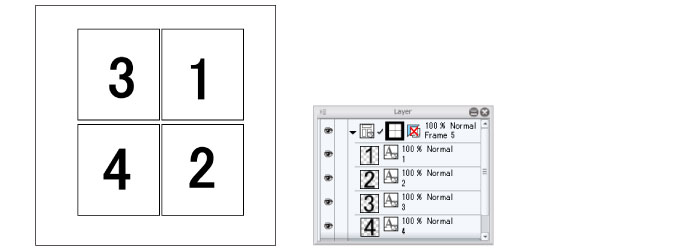
Create common folder
Combines the folders into one frame border folder, while leaving the border lines as they are. The original frame border folders are not deleted.
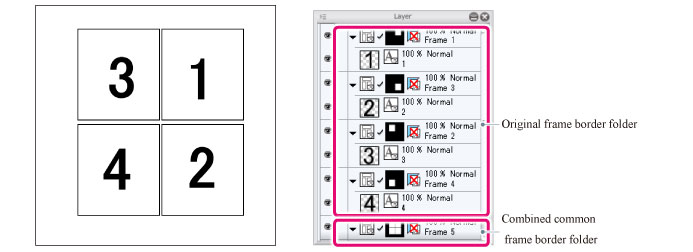
Show in All Layers
Select a layer with a ruler and select the [Layer] menu > [Ruler/Frame] > [Show in All Layers] to display rulers on all layers. The ruler can be snapped to on the following types of layer:
·Raster layer
·Vector layer
·Selection layer
·Quick mask
·Balloon tool (When Balloon pen is selected)
|
|
If you select a ruler inside an animation folder and turn on [Show in All Layers], the ruler can only be snapped to within the selected cel. |
Show in Same Folder
Select a layer with a ruler and select the [Layer] menu > [Ruler/Frame] > [Show in Same Folder] to display rulers on all layers in the same folder. The ruler can be snapped to on layers in the same folder. For layers that can snap to rulers, please see the previous section.
Show Only When Editing Target
Select a layer with a ruler and select the [Layer] menu > [Ruler/Frame] > [Show Only When Editing Target] to display the rulers only on the current layer.
Link guide to ruler
Select the [Layer] menu > [Ruler/Frame] > [Link guide to ruler ruler] to link the ruler to the layers created above it.
When turned on, rulers and guides can be moved together with the [Move layer] tool.


