Registering a Material [PRO/EX]
This section describes how to register a material to the Material palette.
|
|
·For details on how to install materials downloaded at the time you purchased Clip Studio Paint, see the Clip Studio Paint Installation Guide. This can be found on the download website of Clip Studio Paint.Registered materials can be uploaded to the Clip Studio cloud using the portal application Clip Studio. For details on uploading methods, please see Clip Studio TIPS. ·Clip Studio can be launched via the [File] menu ([CLIP STUDIO PAINT] menu on macOS and Tablet) > [Open CLIP STUDIO]. |
Registering a Material from the Canvas
To register an image selected on the canvas to the Material palette, proceed as follows.
1Select the image
With a marquee tool, select the image to convert into material.

|
|
If there is no selection, the drawing on the canvas will be registered to the Material palette. |
2 Select the command
Click [Palette menu] on the Material palette, and select [Register image as Material].

|
|
You can also select command from [Edit] menu > [Register Material] > [Image]. |
3Configure the material
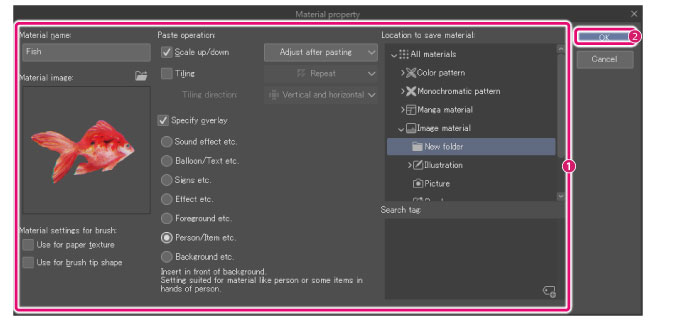
The [Material property] dialog box will open. Configure the settings for the material on the dialog box.
|
|
For details on the [Material property] dialog box, see "Material property Dialog Box [PRO/EX]". |

(1) You can configure settings such as name, content, paste operation, save destination, and tag for search for the material.
(2) Click [OK].
4The conversion of image into material is complete
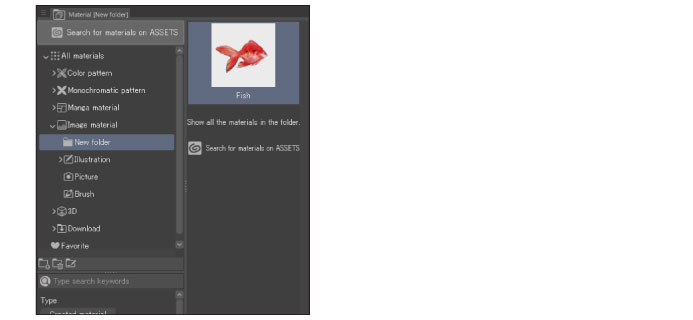
The dialog box closes and the material is registered in the Material palette.


