Changing a Comic Frame’s Thickness, Color, and Line Style
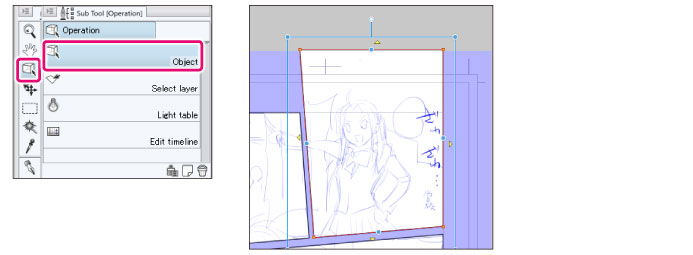
Click on the comic frame you want to edit on the canvas using the [Operation] tool’s [Object] sub tool. A bounding box will show around it.

|
|
Make sure that handles and guide lines are displayed on the frame you want edited. This setting displays when a frame folder is selected. |
You can change comic frame settings in the Tool Property palette.
Changing a Comic Frame’s Width
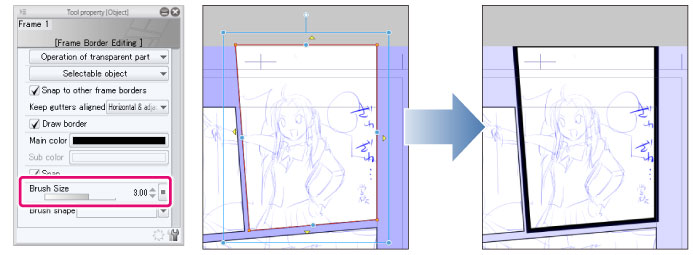
You can set the comic frame’s thickness with [Brush Size] on the Tool Property palette.

Changing a Comic Frame’s Color
Set the [Expression color of border] on the Layer Property palette to [Color].

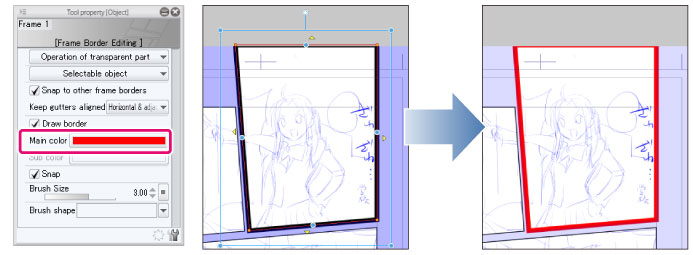
Clicking the [Main color] color icon on the Tool Property palette opens the [Color settings] dialog box. Selecting a color from the [Color Settings] dialog box changes the color of a comic frame’s line.

Changing a Comic Frame Line’s Style
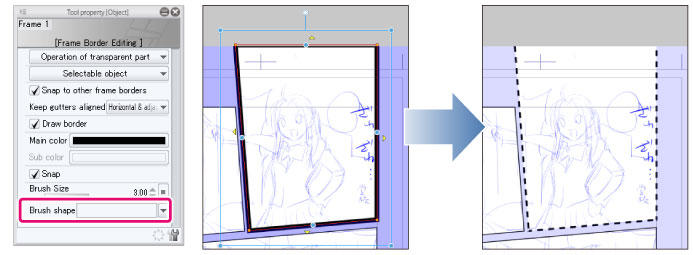
You can change a comic frame line’s style with [Brush shape] on the Tool Property palette.

|
|
·If you select [Brush shape] > [Brush tip] and then select the [Material] option on the Sub Tool Detail palette, you can register the frame as a brush tip shape in the Material palette. For details, see the Clip Studio Paint Tool Setting Guide. ·If you turn off [Draw Border] on the Tool Property palette, only the ruler is created. If you turn on [Snap] in the Tool Property palette and switch to another layer, you can draw the frame with a pen tool using varied pen pressure. |


