Using the Comic Frame Border Tool
You can use the comic [Frame Border] tool to draw a frame along the default frame.
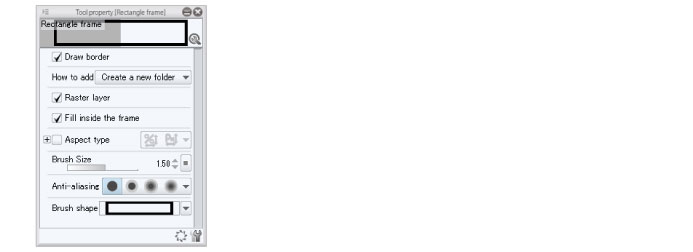
1Select the [Frame Border] tool from the Tool palette. Select the [Rectangle frame] sub tool from [Create frame] on the Sub Tool palette.

|
|
·The initial configuration of the sub tools has been changed from Ver.1.6.2. For those who are used to a previous version of Clip Studio Paint, this operation is now performed by selecting the [Figure] tool and then selecting [Frame Border] on the Sub Tool palette. ·You can transform comic frames by using the [Polyline frame] or the [Frame border pen] sub tool. |
2Set comic frames for drawing from the Tool Property palette.

|
|
·The line thickness can be set from [Brush Size] on the Tool Property palette. ·You can change the Tool Property palette’s [Brush Size] unit type to [mm] or [px] from [Unit of length] under [Ruler/Unit] in the [Preferences] dialog box. For details, see "Ruler/Unit". ·For details on the Tool Property palette, see the “Clip Studio Paint Tool Setting Guide.” |
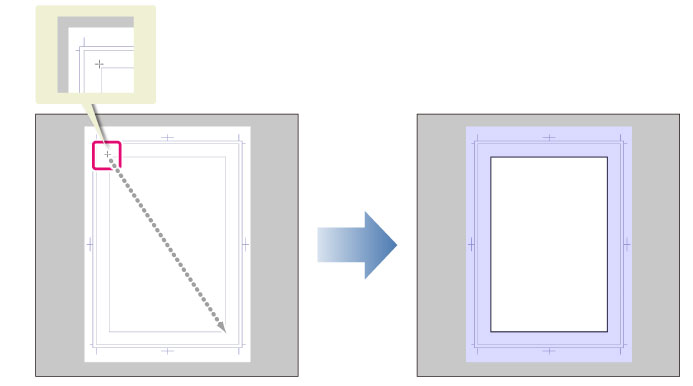
3Place the mouse cursor by the default border and then drag and drop it onto the canvas.
A new frame folder will be added to the Layer palette, and a frame line will be drawn on the canvas along the default frame.

|
|
When you move the mouse cursor near the default frame, you can draw comic frames that snap to the default border. |


