Pasting a Tone Layer
Create a selection and paste a tone layer.
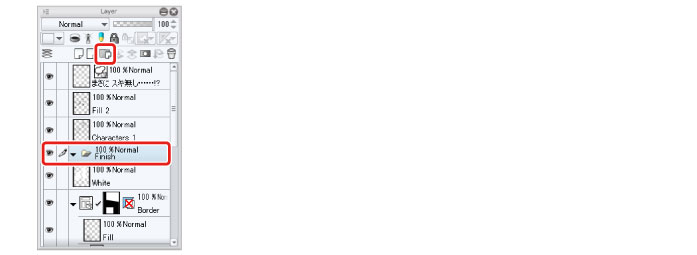
1On the [Layer] palette, create a [Layer Folder] to manage the tone layers together.
Click [New Layer Folder] on the [Layer] palette to create a layer folder. Change the layer folder name to "Finish".
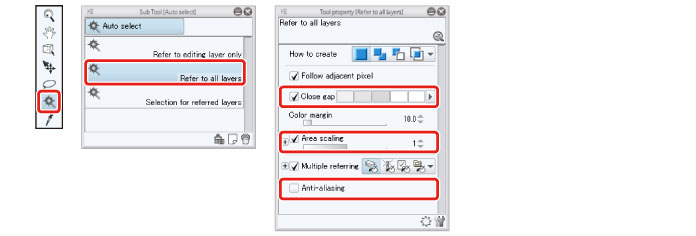
2Select the [Auto select] tool and then select the [Sub tool] palette → [Auto select] → [Refer to all layers]. Configure the settings on the [Tool Property] palette as shown below.
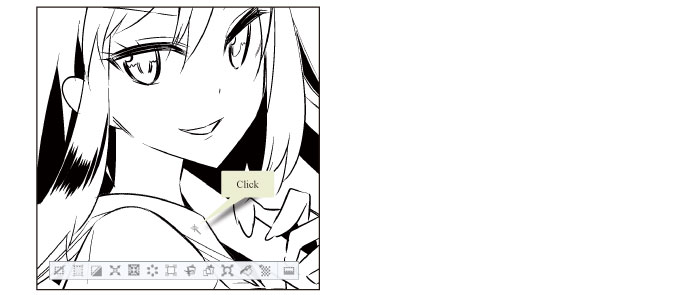
3Click the area in which to paste the tone and create a selection.
4Click [New Tone] in the [Selection Launcher].

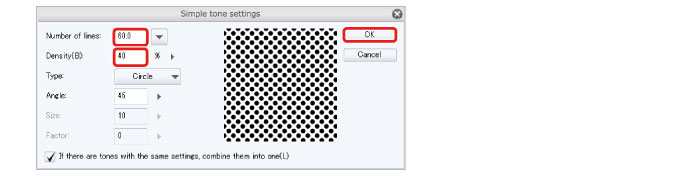
5In the [Simple tone settings] dialog box, set the [Change screen frequency] and [Density] as shown below and click [OK].
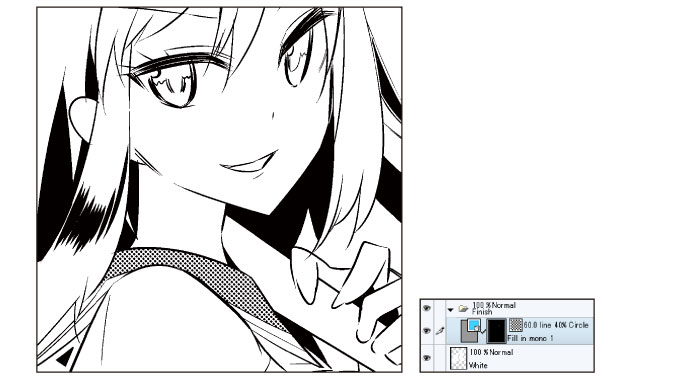
6The tone is pasted. A toned [Fill in Monochrome] layer is created on the [Layer] palette when the tone is pasted.
|
|
The area is automatically deselected after creating the tone if the tone is created in the [Selection Launcher]. In other cases, deselect the area by clicking [Deselect] in the [Selection Launcher] or selecting the [Selection] menu → [Deselect]. |
7To paste the same tone to other areas, select the [Fill in Monochrome] layer you have created in the [Layer] palette and add it to the other areas by using the [Fill] tool and [Pen] tool.
When selecting a [Fill in Monochrome] layer on the [Layer] palette, click the layer name or the layer mask thumbnail, not the thumbnail of the layer.
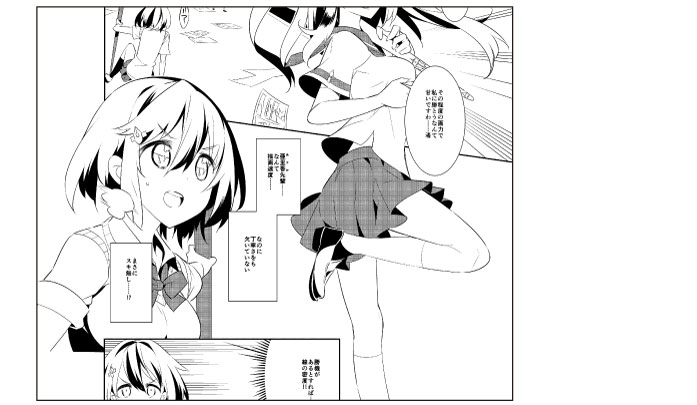
8Repeat steps 2 to 7 to paste tones to other areas of the canvas, varying the density and screen frequency to create different tones.
Changing the values for [Density] and [Screen frequency] in the [New Tone Settings] dialog box from step 5 allows you to create a new [Fill] layer different settings.
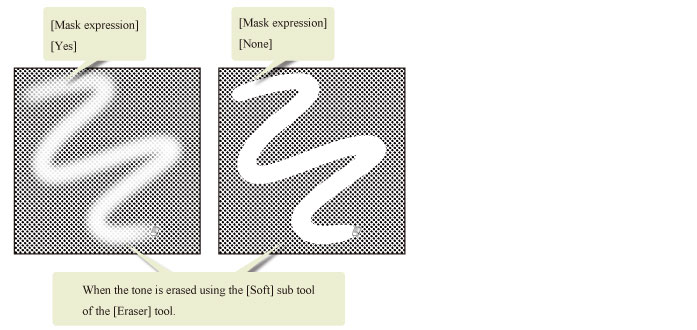
Tips: Mask Posterization
When toning is applied to layers such as [Fill in Monochrome] layers, [Mask expression] is set to [Yes] on the [Layer Property] palette. The results of operations such as erasing with the [Soft] sub tool of the [Eraser] tool differ depending on whether [Mask expression] is set to [Yes] or [No]. The content is also printed differently depending on whether [Print Settings] → [Expression color] is set to [Duotone (Toning)] or [Duotone (Threshold)].