


Pasting Materials
The way to import a material varies depending on the selected material.
|
|
A cloud icon with an arrow may be displayed for a material when using the Clip Studio cloud. This icon is displayed if the material data only exists in the cloud. A confirmation message is displayed when you drag and drop the material to the canvas. Click [Yes] to open Clip Studio and start downloading the material. After downloading, the material can be used as normal. |
Image Materials
Image materials can be pasted by dragging them from the Material palette to the canvas.

|
|
·Materials can also be pasted to the canvas by clicking [Paste material] on the Material palette. ·You can also paste materials to the canvas by dragging and dropping the thumbnail to the Layer palette. ·Selecting multiple materials and dragging and dropping them to the canvas, allows you to paste them in one go. ·When using Windows/macOS, image materials can be pasted onto the canvas via the [Material list] in Clip Studio in the same way. |
For Animation Materials [PRO/EX]
Animation materials registered in a palette are pasted by dragging from the Material palette and dropping to the canvas.
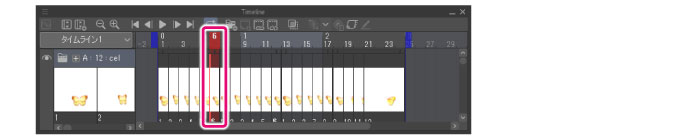
1Select the frame
Select the frame from which to start the animation material in the Timeline palette.
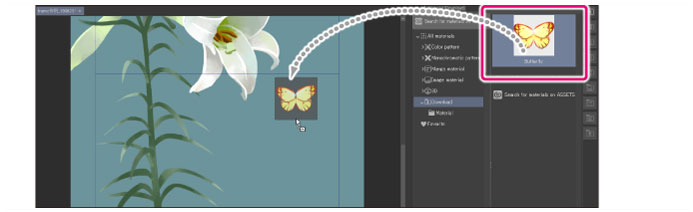
2Pasting an Animation Material
Drag and drop an animation material from the Material palette to the canvas.
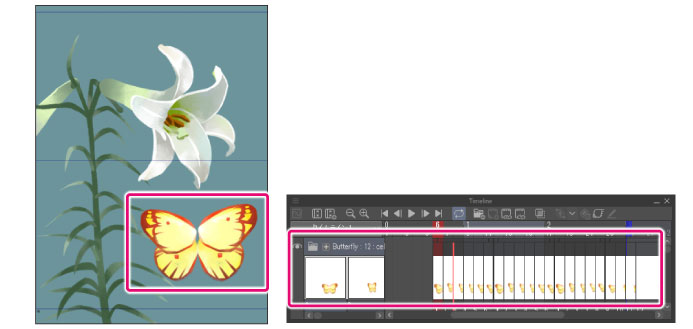
3Pasting an Animation Material
The animation material is pasted to the canvas and the Timeline palette.
|
|
·Animation materials cannot be pasted if the timeline is disabled. ·If the frame rate of the registered material is different from the frame rate of the canvas where the material is pasted, the playback time of the animation material is maintained when pasting the material. The number of frames in the animation material may change as a result. |
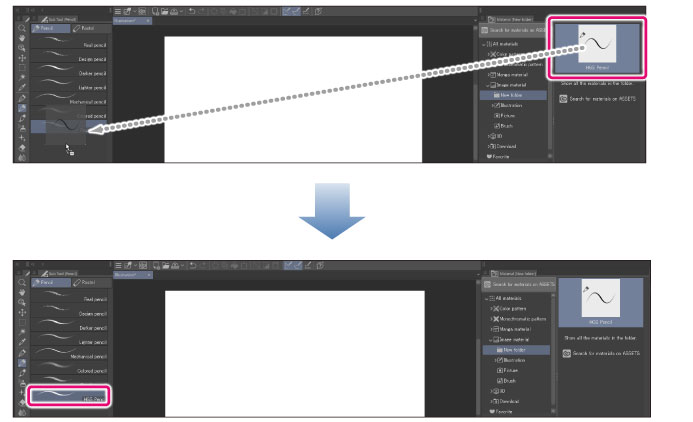
Sub Tools
You can import materials to the Sub Tool palette by dragging and dropping them.
|
|
·When using Windows/macOS, the sub tools can be imported into the palette via the [Material list] in Clip Studio in the same way. ·Selecting multiple sub tool materials and dragging and dropping them on the palette allows you import them to the palette in one go. ·You can also import sub tool materials from the Sub Tool palette menu. ·Some sub tools cannot be imported to DEBUT. |
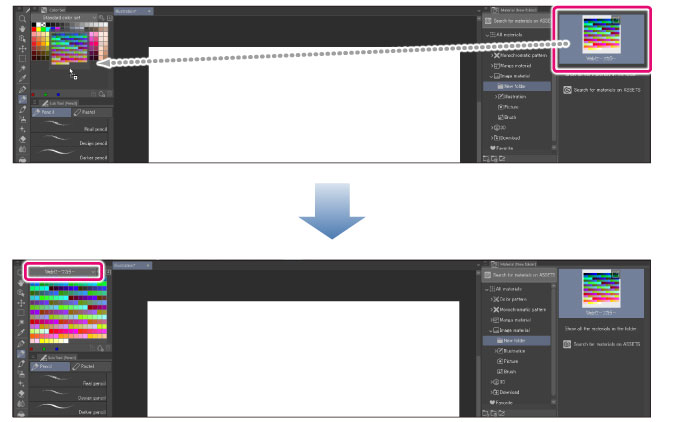
Color Sets
Color sets can be imported to the Color Set palette by dragging and dropping.
|
|
·When using Windows/macOS, color sets can be loaded into the palette from the [Material list] in Clip Studio in the same way. ·Selecting multiple color set materials and dragging and dropping them to the palette allows you import them to the palette in one go. ·You can also import color sets with the [Import color set material] option in the Color Set palette menu. ·Some color sets may not be imported in DEBUT depending on their content. |
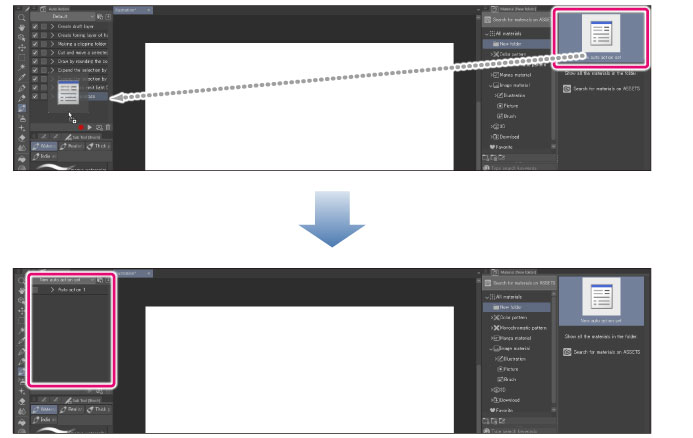
Auto Action Sets [PRO/EX]
To import an auto action set, drag and drop the material to the Auto Action palette.
|
|
·When using Windows/macOS, Auto action sets can be loaded into the palette from the [Material list] in Clip Studio using the same operation. ·Selecting multiple auto action set materials and dragging and dropping them to the palette allows you import them to the palette in one go. ·Even when executing [Import material set] from the Auto Action palette, auto action materials can be loaded to the Auto Action palette. |
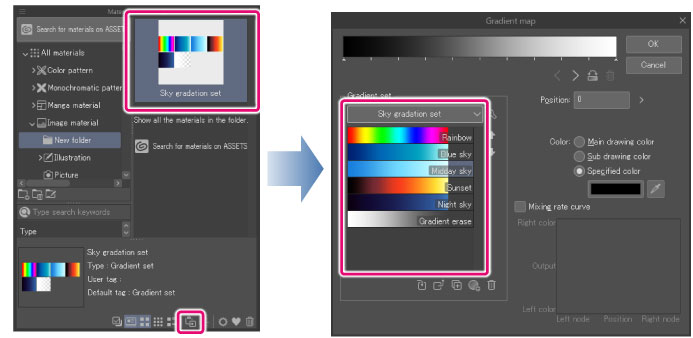
Gradient set [PRO/EX]
To import a gradient set, select a gradient set from the Material palette and click [Paste material].
|
|
·Gradient set materials can also be imported from the [Gradient Map] dialog. For details, see "[Gradient map] dialog box". ·Multiple gradient sets can be batch imported by selecting the gradient set materials and clicking [Paste material]. |
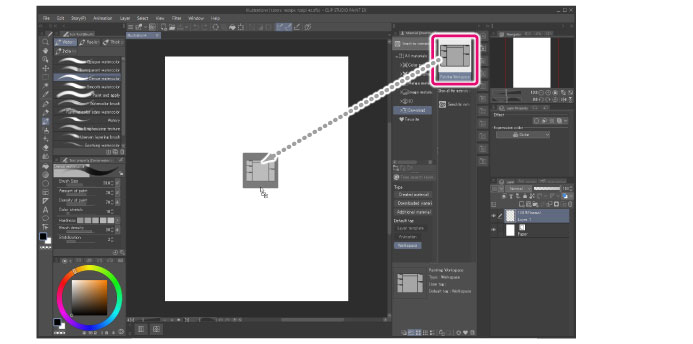
For workspaces [PRO/EX]
Workspaces can be loaded from the Material palette.
1Select the material
You can select a workspace from the Material palette and drag and drop it to the canvas.
|
|
·In macOS, workspaces cannot be loaded when the canvas is not open. ·When using Windows/macOS, workspaces can be loaded into the palette from the [Material list] in Clip Studio using the same operation. ·The [Register Workspace] dialog box is displayed if a workspace is not applied to the main window. In this case, enter a [Name] and click [OK]. The state before a workspace was loaded is registered as a workspace. For how to register a workspace, see "Register Workspace [PRO/EX]". |
2Select the items to load
The [Workspace import settings] dialog box is displayed. In the dialog box, specify the items other than the palette layout you want to load.
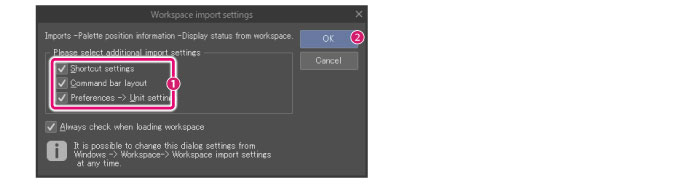
(1) Specify items to load.
(2) Click [OK].
|
|
For the [Workspace import settings] dialog box, see "Workspace import settings [PRO/EX]". |
3The workspace is loaded
A confirmation message is displayed before the workspace is loaded.

(1) Click [OK] in the message that is displayed.
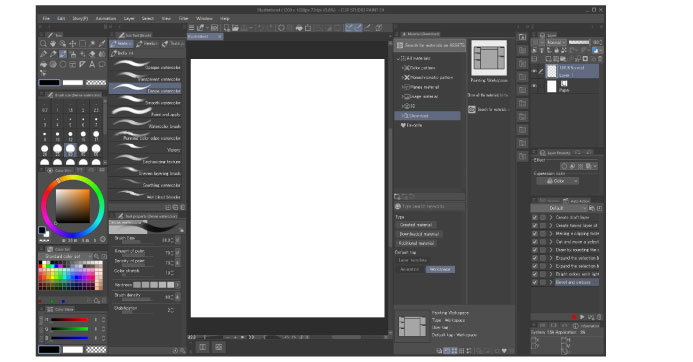
(2) The palette layouts and settings in the workspace material are reflected in the main window.
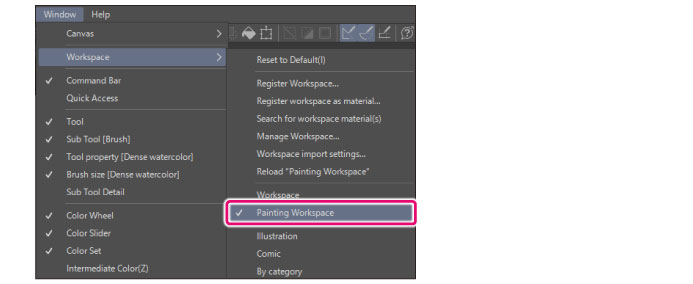
The workspace loaded from the Material palette is registered to the [Window] menu > [Workspace] at the same time. This workspace can be loaded later by selecting this command.
|
|
·Selecting multiple workspaces and dragging and dropping them into the palette allows you to register multiple workspaces to the [Window] menu at once. Only one workspace is applied to the main window. ·The palette layout of a workspace material may not be applied as expected if the display environment of the place where the workspace is loaded is significantly different from the place where it was registered. |