Creating a Comic Frame
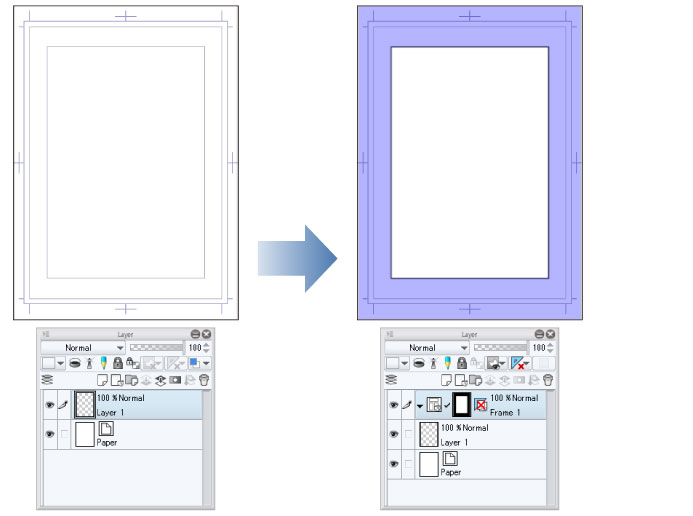
First, create a new Frame folder over the default border. There are three ways to create a Frame folder.
·"Creating a New Frame Folder"
·"Using Comic Framing Templates"
·"Using the Comic Frame Border Tool"
|
|
Comic Frames can be divided after creating a Frame folder. For details on editing comic Frames, see "Editing a Comic Frame". |
Creating a New Frame Folder
Select [Layer] menu > [New Layer] > [Frame Border folder] to show the [New frame folder] dialog box.
Set the items in the [New frame folder] dialog box and click [OK]. This creates a new frame folder on the Layer palette with a line drawn on the canvas.

|
|
·For details on the [New frame folder] dialog box, refer to "Frame Border Folder [PRO/EX]". ·You can change the [New frame folder] dialog box’s [Line width] unit type to [mm] or [px] from [Unit of length] under [Ruler/Unit] in the [Preferences] dialog box. For details, see "Ruler/Unit". |
Using a Comic Frame as a Ruler
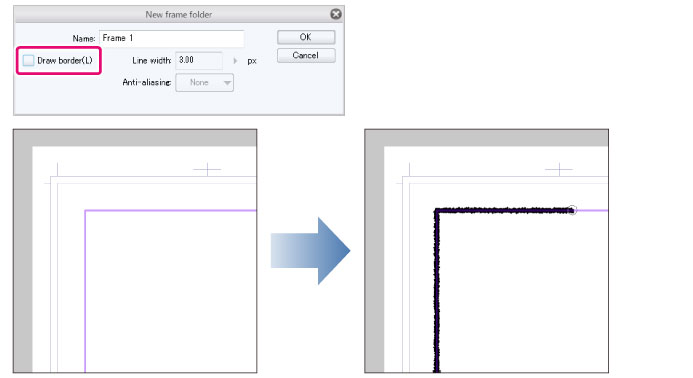
When [Draw Border] in the [New frame folder] dialog box is turned off, a line will not be drawn. Only a ruler will be created in the Frame folder. You can draw lines with the ruler by creating a layer above the Frame folder and drawing on it with a drawing tool.
An advantage of drawing with a ruler is that you can use pen pressure to create varied lines.
|
|
We recommend drawing frame lines after dividing comic frames. If you divide a comic frame after you’ve drawn a line along with it, the drawn line will remain unchanged. For details on how to divide comic Frames, see "Dividing a Comic Frame". |


