


Adding Shadow (Without Runover)
Use the areas you filled with the main skin color before to draw the shadow on the skin.
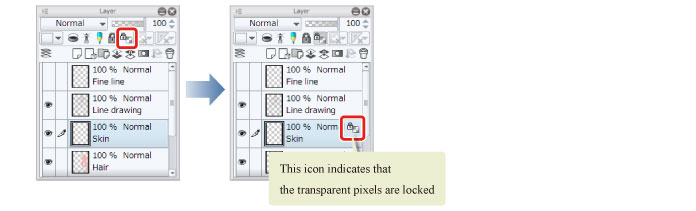
1Click [Lock Transparent Pixel] on the [Layer] palette.
An icon with a gray padlock and a checkered square appears next to the layer on which the transparent pixels are locked.
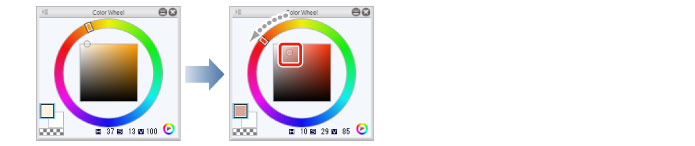
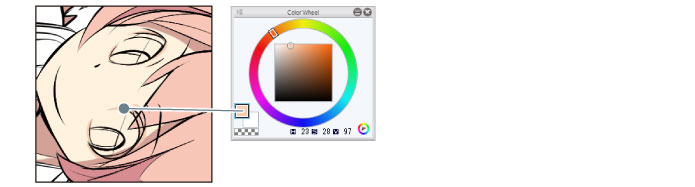
2Select a slightly darker color than peach on the [Color Wheel] palette.
A more reddish hue will stop the shadow from looking somber and give the character a healthy-looking complexion.
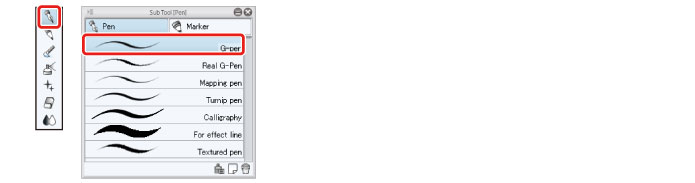
3Select the [Pen] tool from the [Tool] palette and select [G-pen] from the [Sub tool] palette.
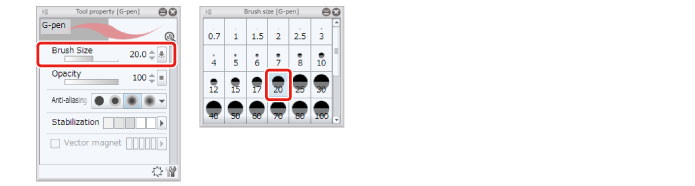
4Adjust the brush size of the [Pen] tool.
Adjust this in [Tool Property] or select a size from [Brush Size]. Set a slightly larger brush size than when drawing the lines to allow even coloring.
5Draw the shadows around the neck and those created by the sleeves and hair.

6If you draw shadow too far, correct it by applying the basic skin color using the [Pen] tool.
The [Eraser] tool cannot be used in this case as it will also erase the peach color underneath.
7When drawing the shadow around the eyes, use the [Color Wheel] palette to select a slightly lighter shade than the other skin shadows so that this area is not too dark.
Tips: What Is the [Lock Transparent Pixel] Function?
This function ensures that nothing is drawn in the transparent areas (on the transparent pixels) of the layer.
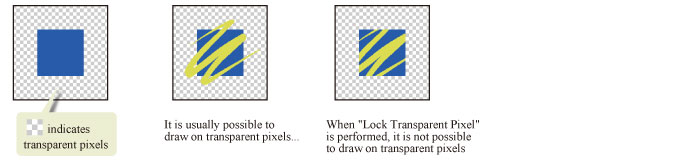
This allows you to add shadow without running over onto areas that have already been colored, such as the hair, or the skin in later steps.