Coloring with the [Gradient] Tool 1
Create a selection for each part and add a gradient to the wings using the [Gradient] tool.
|
|
If the [Gradient] tool is used without creating a selection, it will draw a gradient across the entire layer. Creating a selection first allows you to apply a gradient across the selected area only. |
1Select the [Auto select] tool from the [Tool] palette and select [Refer to all layers] from the [Sub tool] palette.

|
|
For details on the [Auto select] tool, see "CLIP STUDIO PAINT Tool Setting Guide" → "Tool and Sub Tool Categories" → "Input/Output Process / Category List (by Tool/Sub Tool)" → "Auto select". |
2Click the bones of the wings and select the area in which to apply the gradient.

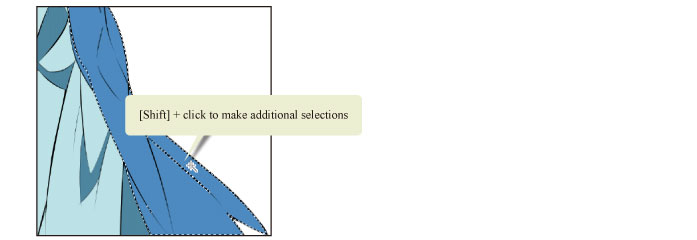
3If the bones are separated into multiple segments in the line drawing and cannot be selected with one click, hold down the [Shift] key and click each segment to add the segments to the selection.

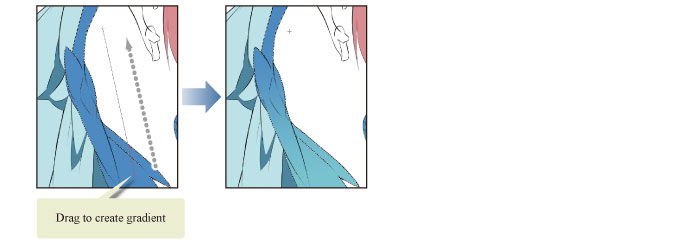
4Select the [Gradient] tool from the [Tool] palette and select [Foreground to transparent] from the [Sub tool] palette.

The [Foreground to transparent] setting creates a gradient from the selected drawing color to transparency. If it is applied to an area that has already been filled, this creates a gradient from the current drawing color to the ground color.
5Select a slightly lighter shade of blue on the [Color Wheel] palette.

6Click the starting position of the gradient and drag in the direction in which to apply the gradient.

7After creating the gradient, click the [Selection] menu → [Deselect] to deselect the selected area.
This can also be done by selecting [Deselect] on the command bar or the selection launcher.

8Repeat the same process for other areas such as the trailing edges, creating selections and drawing gradients for each part.


