


Adjusting the Overall Contrast
Place the layers used for coloring the character together in a [Layer Folder] and adjust the overall contrast of the character.
Preparing the Layer Folder
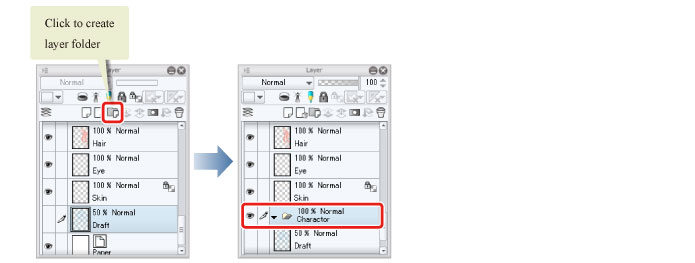
1On the [Layer] palette, select the "Draft" layer. Click [New Layer Folder] to create a layer folder.
Double click the name of the layer folder you have created and change the name to "Character".
|
|
For details on layer folders, see "CLIP STUDIO PAINT User Guide"→ "Menu" → "Layer Menu" → "New Layer Folder". |
2On the [Layer] palette, select the "Clothing 1: Light" layer. Hold down the [Shift] key and click the "Skin" layer to select all of the layers from the "Clothing 2: Light" layer to the "Skin" layer.
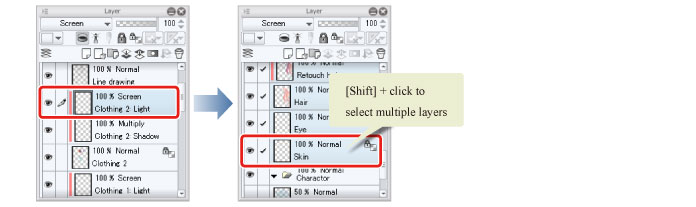
3Drag and drop the selected layers into the "Character" folder.

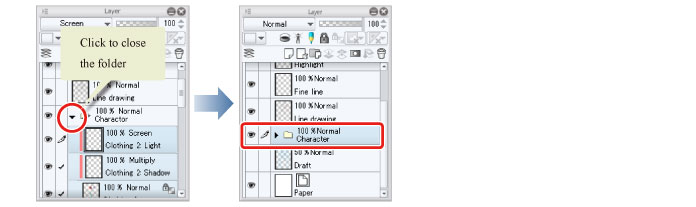
Click the "▼" mark next to the "Character" folder to close the layer folder.
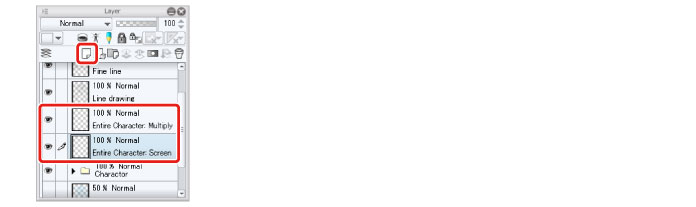
4While the "Character" layer folder is selected on the [Layer] palette, click [New Raster Layer] twice.
Two new raster layers are created.
5Double click the layer name of each layer you have created and change the layer names to "Entire Character: Multiply" and "Entire Character: Screen".
Change the stacking order of the layers to "Entire Character: Multiply" → "Entire Character: Screen" → "Character" (from top to bottom).
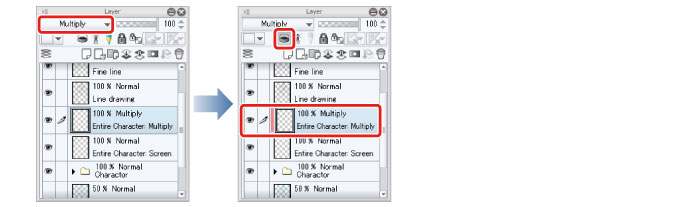
6On the [Layer] palette, select the "Entire Character: Multiply" layer. Change the [Blending mode] of the layer to [Multiply] and click [Clip at Layer Below].
7On the [Layer] palette, select the "Entire Character: Screen" layer. Change the [Blending mode] of the layer to [Screen] and click [Clip at Layer Below].
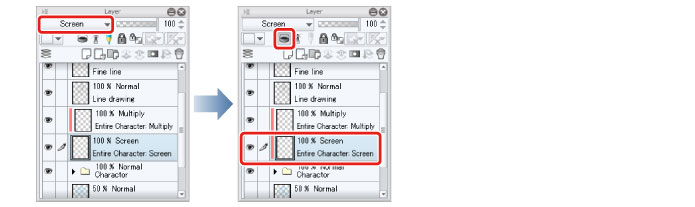
Clipping to the [Layer Folder] allows you to clip to all of the image areas in the [Layer Folder].