Sound Effects Lettering
Draw lines for sound effect lettering using tools such as the [Pen] tool.
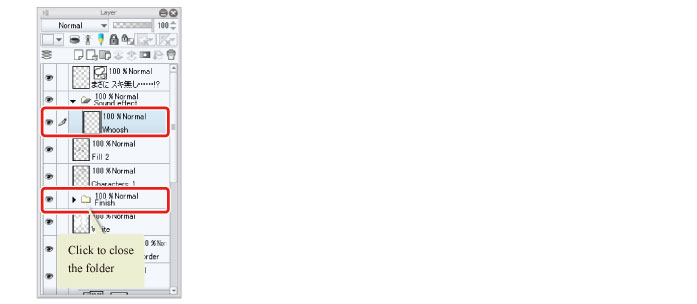
1Click [New Layer Folder] on the [Layer] palette to create a layer folder. Change the name of the created layer folder to "Sound effect".
Change the stacking order of the layers so that the "Sound effect" folder is immediately below the "Balloon layer" folder.
2Once the "Sound effect" folder has been created on the [Layer] palette, click [New Raster Layer] to create a raster layer. Change the layer name of the created layer to "Whoosh".
Tidy up the [Layer] palette by clicking the [▼] marks next to the "Border" frame border folder and the "Finish" folder to close the folders.

|
|
With the iPad, move any layers by hovering the mouse cursor over the grip on the right side of the layer and move it. For details, see "Drawing the Fine Details" → "Drawing the Eyes (Combine Layers)" → "Drawing the White of Eye" → "Tips: When unable to move layers on the iPad." . |
3Select the main color on the [Tool] palette.
Check that the main color is black. If a color other than black is selected, select black using a palette such as the [Color Set] palette.

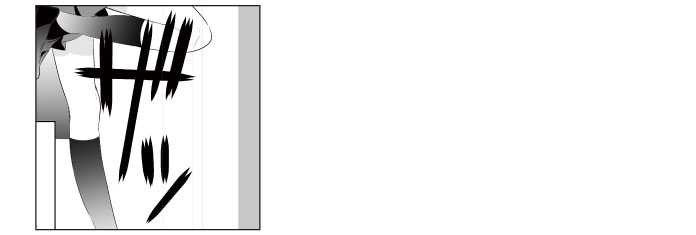
4Set a large brush size for the [Pen] tool and write "Whoosh" as a sound effect lettering.

5Click [New Raster Layer] on the [Layer] palette again and change the layer name to "Bang".
6Write "Bang" as a sound effect lettering.
After drawing the outlines of the text in black with the [Pen] tool, change the drawing color to white and fill the outlines using the [Refer only to editing layer] sub tool of the [Fill] tool.


