Inking
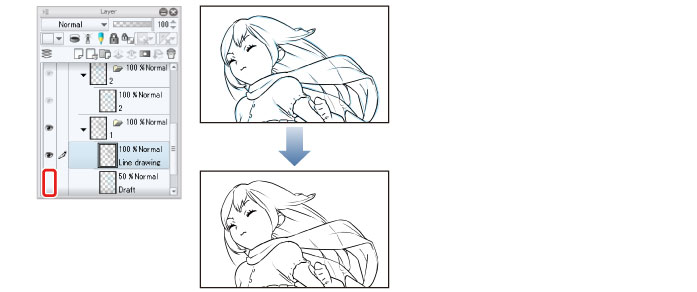
Ink each cel.
Draw the First Cel
Add a layer to cel "1" (layer folder) and start inking.
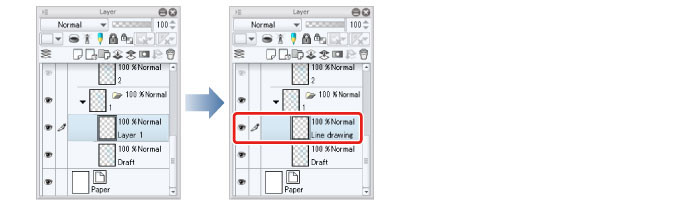
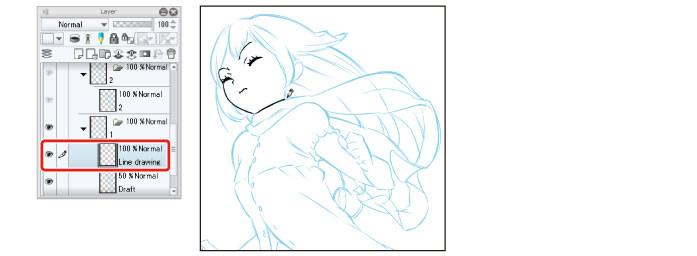
1Select the "1" layer in cel "1", double click the layer name and enter "Draft".

2Select the "Draft" layer in cel "1" and click [New Raster Layer] on the [Layer] palette.
A layer is created.
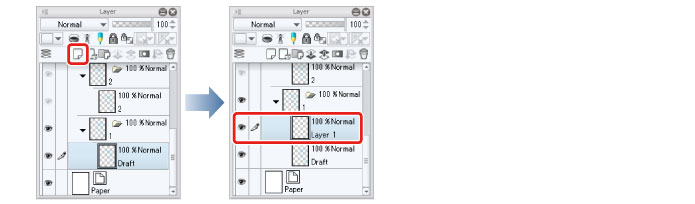
3Double click the layer name of the layer you have created and enter "Line drawing".
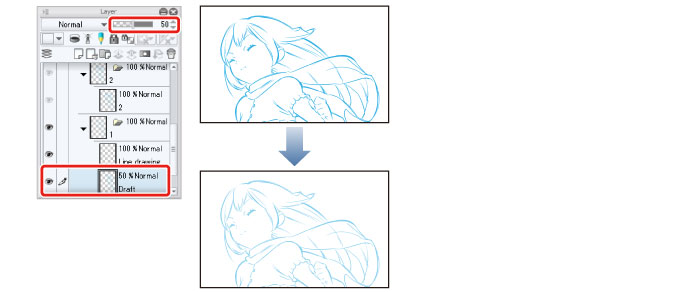
4Select the "Draft" layer and change [Opacity] to 50%.
Lowering the opacity of the draft makes it easier to see the inking lines.
5Select the "Line drawing" layer and start inking.
|
|
·For details on inking, see "Try Drawing an Illustration in CLIP STUDIO PAINT Basic Guide" → "Inking" . ·If you cannot ink the layer, see "If You Cannot Draw on a Cel (Layer)" . |
6Click the [Show/Hide Layer] icon on the left of the "Draft" layer to turn it off.
This hides the "Draft" layer so that only the line drawing is shown.