P
Perspective ruler [PRO/EX]
Displayed items vary depending on the selected tool or sub tool.
→ "When the Object sub tool is selected"
→ "When the Perspective ruler sub tool is selected"
When the Object sub tool is selected
Allows you to configure how to display the ruler or snap to ruler and the like when a perspective ruler is selected with the [Object] sub tool.
(1) Snap
When turned on, snap to a perspective ruler is enabled. When another special ruler is displayed on the same canvas, snap to other ruler is disabled.
|
|
Clicking the rhombus handle (◊) on the perspective ruler allows you to enable/disable snap to all perspective rulers or each guide line. |
(2) Fix eye level
Configures the eye level operation. When turned on, the vanishing point moves along the eye level. When turned off, the position of the eye level moves in conjunction with the vanishing point.
|
|
Eye level is a line that represents the height at which the line of vision or camera is located. A horizontal vanishing point is placed at the eye level. |
(3) Horizontalize eye level
The eye level can be horizontalized by clicking.
(4) Grid
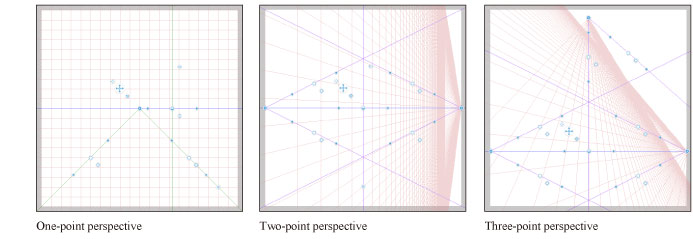
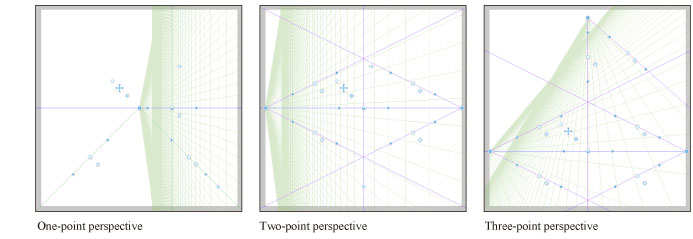
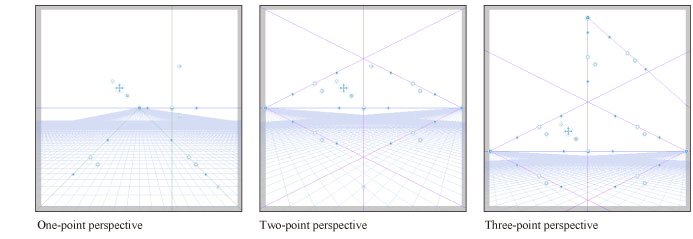
Displays equally-spaced grid (auxiliary lines) from the vanishing point. The grid displayed by each button is different.
|
|
·Grids may not display depending on where the vanishing point has been placed. ·To snap to the grid, turn on snap by selecting [View] menu → [Snap to Grid]. |
XY plane
YZ plane
XZ plane
(5) Grid size
Specifies the size (gap) between grid lines. The larger the size, the wider is the area where the grid displays.
When the Perspective ruler sub tool is selected
Allows you to configure the vanishing point, guides and the like for the perspective ruler. Furthermore, it allows you to create a new perspective ruler.
(1) Content of process
Configures how to edit the perspective ruler. Allows you to edit the vanishing point, guide and the like.
Add vanishing point
Adds a vanishing point to the perspective ruler. Drag on the canvas tocreate two guides. The vanishing point will be added at the intersection of the guide lines. Creates a new perspective ruler when there is none.
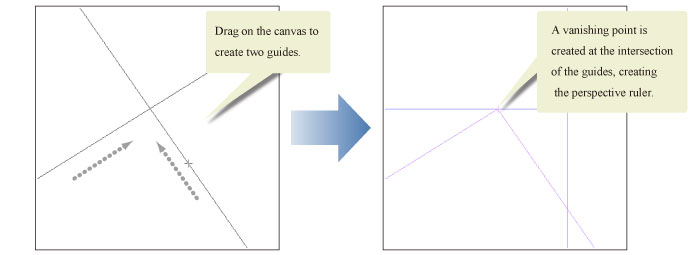
|
|
Creating two parallel guide lines creates a perspective ruler with the vanishing point at infinity. To create parallel guide lines, create the guide line with the [Shift] key held down. It allows you to match the angles easily as the angle of the guide line will vary in steps of 45 degree. |
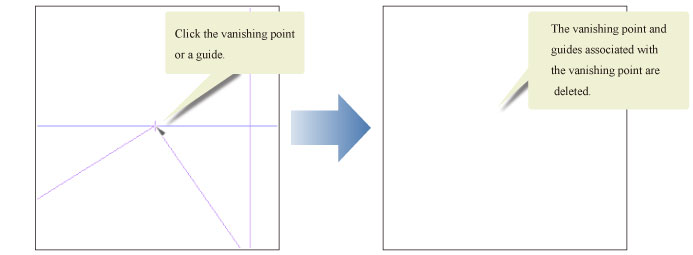
Delete vanishing point
Deletes a vanishing point from the perspective ruler. To delete a vanishing point, click the vanishing point or a guide.
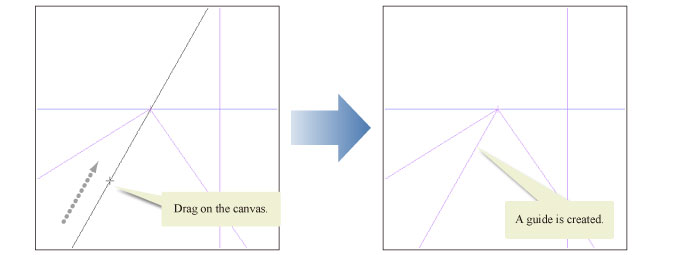
Add guide
Adds a guide to the perspective ruler. Dragging on the canvas adds a guide up to the closest vanishing point in the dragged direction.
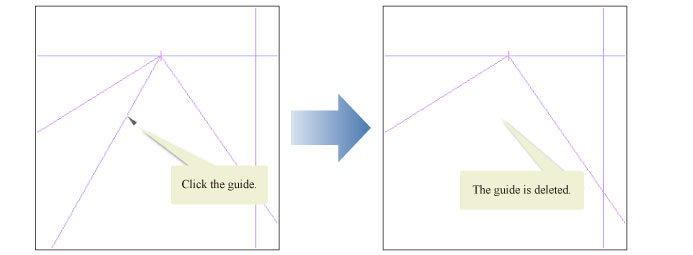
Delete guide
Deletes a guide from the perspective ruler. To delete a guide, click the guide.
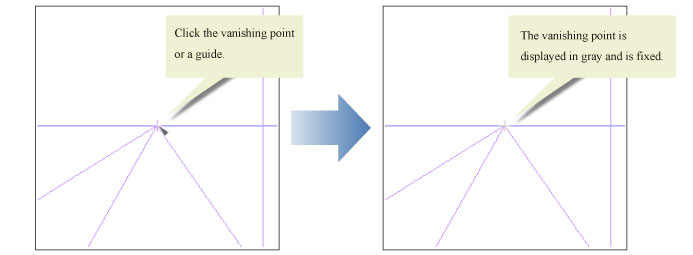
Fix vanishing point
Fixes the vanishing point. To fix, click the vanishing point or a guide.
|
|
To free the vanishing point, configure [Fix vanishing point] for [Content of process] and click the fixed vanishing point or a guide again. |
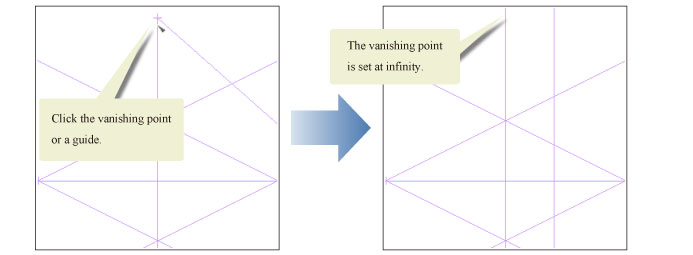
Infinitize
Places the vanishing point at infinity. To set to infinity, click the vanishing point or a guide.
(2) Change perspective drawing method
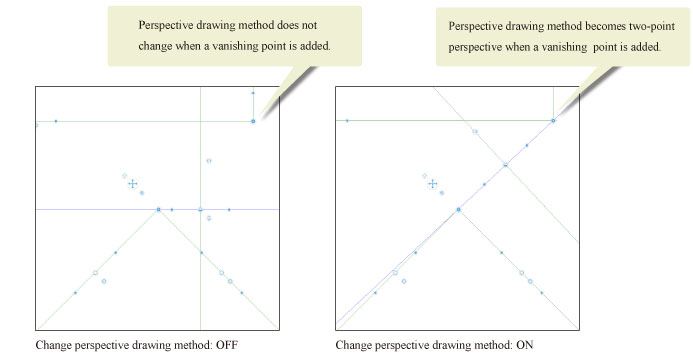
When turned off, allows you to add an auxiliary vanishing point without changing the perspective drawing method.
When turned on, adding a vanishing point to an existing perspective ruler with the [Perspective ruler] sub tool changes the perspective drawing method.
·Adding a vanishing point to a one-point perspective ruler changes the ruler to a two-point perspective ruler.
·Adding a vanishing point to a two-point perspective ruler changes the ruler to a three-point perspective ruler.
(3) Create at editing layer
When turned on, creates the perspective ruler on the edited layer.
|
|
[Create at editing layer] is available only when [Add vanishing point] is configured for [Content of process]. |


